My Battle Against Malware: How a Simple USB Drive Saved My Computer
It was a typical Tuesday in 2026 when my computer started acting strange. Pop-ups I couldn't close, sluggish performance, and mysterious new programs appearing on my desktop. My regular antivirus software waved a white flag—it detected the threat but couldn't remove it. The malware had dug its claws deep into my system, and I realized I needed something more powerful. That's when I remembered the humble USB drive sitting in my drawer, a potential digital knight in shining armor.
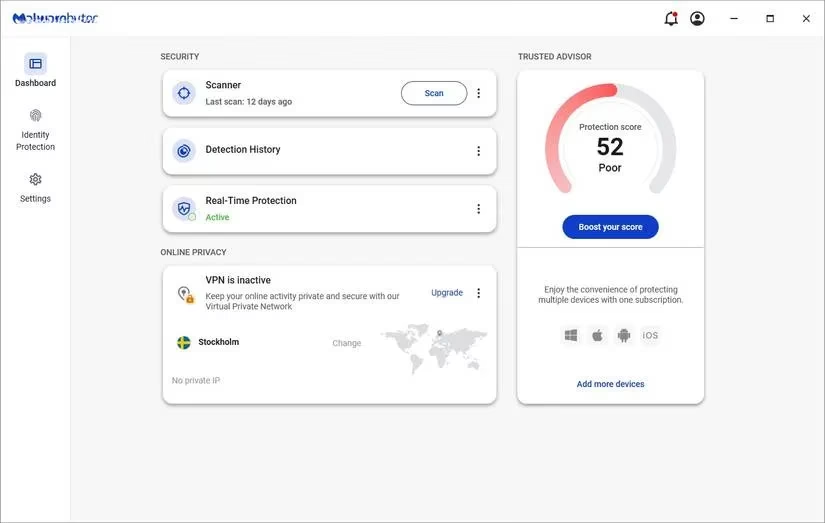
When you can still boot into your operating system, there's hope. I started with specialized antimalware programs, which often work like regular antivirus software but pack a stronger punch. My first line of defense was Malwarebytes. In my testing over the years, it has consistently shown one of the best malware detection rates among various tools. What I appreciate is its comprehensive approach—it doesn't just scan for malware but offers features like scam protection, adware removal, and even a VPN for complete security. Running multiple scans is crucial because some malware hides better than others, requiring persistent effort to completely eradicate.
For Windows users, the Windows Malicious Software Removal Tool (MSRT) is a hidden gem. This lightweight tool comes bundled with monthly Windows security updates but can also be downloaded separately. It's designed to find and remove known malware families while attempting to undo any system changes they made. However, it's important to remember that MSRT doesn't replace traditional antivirus software—it complements it. If you need stronger protection, the Microsoft Safety Scanner is another excellent option.
When I suspected the malware might have spread to my external storage, I turned to UsbFix. This tool performs quick scans at startup and protects USB drives in real-time, which is perfect for preventing cross-contamination between devices. Here's what I learned about effective scanning:
Essential Scanning Practices:
-
Run multiple scans over several days
-
Use different antimalware tools for comprehensive coverage
-
Always update your scanning tools before use
-
Scan in Safe Mode when possible for better detection
But what happens when you can't even boot your computer? That's when things get serious. Malware can completely take over your system, blocking antivirus software and preventing your OS from starting. This is where a bootable rescue USB becomes your digital paramedic kit. By booting outside the infected environment, the malware can't interfere with the cleaning process because the rescue system loads before your compromised OS.
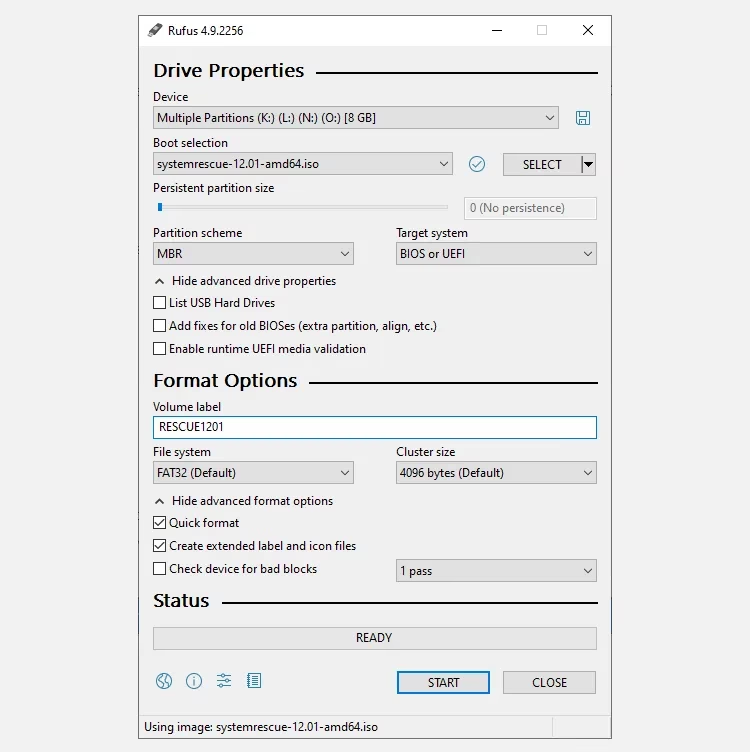
Creating a rescue USB isn't as technical as it sounds. My preferred method uses SystemRescue, which provides an ISO file you can turn into a bootable USB with Rufus. The process is straightforward:
Creating a Bootable Rescue USB with Rufus:
-
Download and install Rufus
-
Click SELECT under Boot selection to choose your SystemRescue ISO file
-
Select MBR from the Partition scheme dropdown
-
Choose BIOS or UEFI under Target system
-
Verify the Volume label reads RESCUEXXXX (X represents version number)
-
Set File system to FAT32
-
Click Start to create the bootable drive
Once your rescue USB is ready, you boot into this temporary environment and use antimalware tools to clean infections. You can also extract important data if you're planning to wipe the drive completely. To boot from the USB, restart your computer with the drive inserted and repeatedly press the BIOS/UEFI access key (usually ESC, F1, F2, F8, or F10, depending on your manufacturer).
If you don't have a full rescue USB prepared, standalone USB malware removal tools can be lifesavers. These lightweight programs run directly from external drives. My top recommendations are:
| Tool | Best For | Key Features |
|---|---|---|
| Emisoft Emergency Kit | Portable cleaning alongside antivirus | Dual-engine scanning, removes unwanted programs |
| Sophos Scan & Clean | Zero-day malware and evasive threats | Removes spyware, Trojans, rootkits, real-time evasion protection |
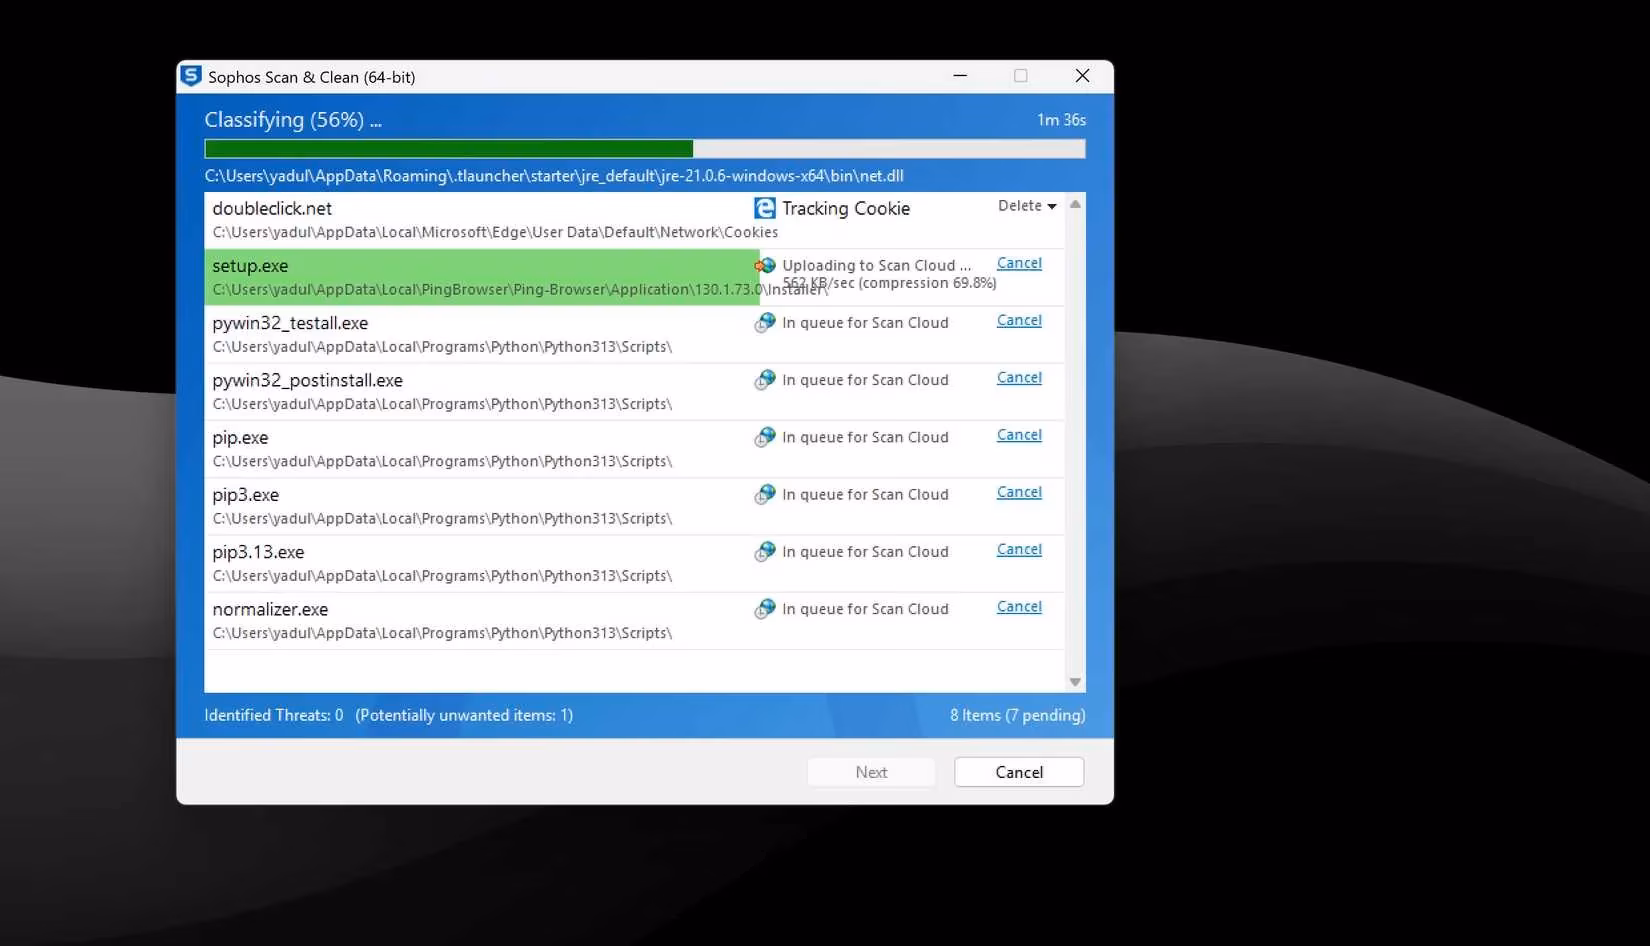
I've found Sophos Scan & Clean particularly effective. It's a single executable file that runs directly from a USB drive. You simply run the executable, accept the terms, and it automatically begins scanning. The program displays threats as it finds them, allowing you to decide whether to remove or ignore each one case by case. This approach is ideal when you can't wipe your entire drive but need to recover data from an infected system.
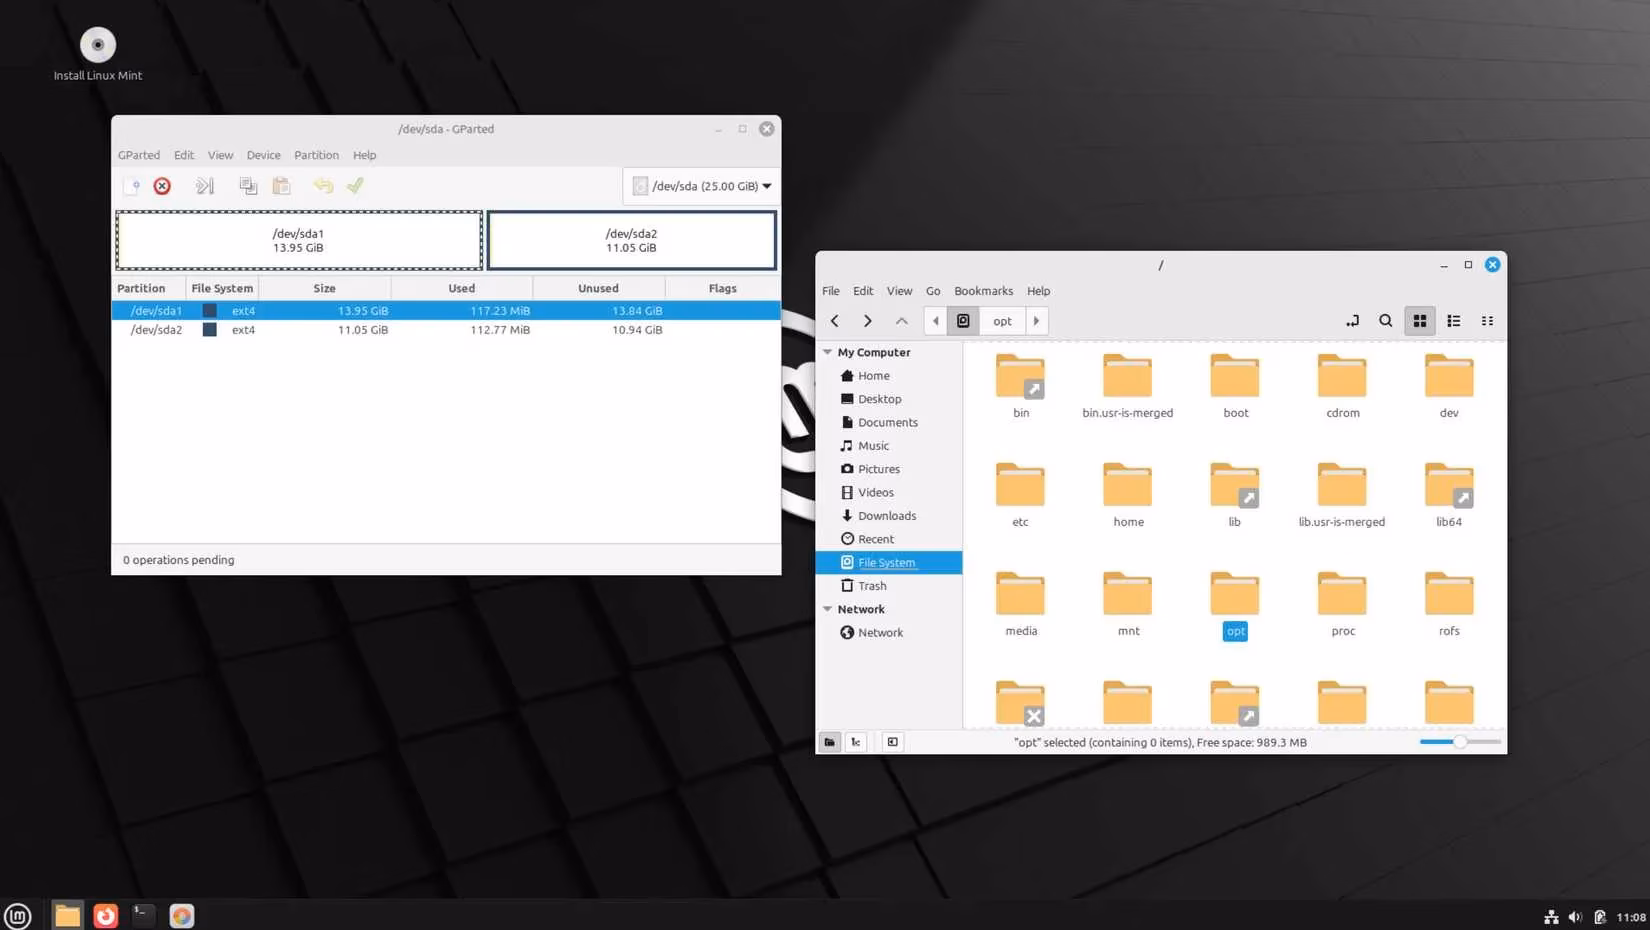
For particularly stubborn infections, sometimes you need to think outside the Windows box. Booting into a Linux system from a USB drive lets you access storage drives and format them before reinstalling your OS. Creating a bootable Linux USB is simple with tools available for Windows, Linux, and macOS. The challenging part comes with Linux's storage management tools.
Command-line tools offer the most direct approach. The command shred /dev/sdx0/ (where x is the drive letter and 0 is the partition number) will completely erase everything from first to last sector. ⚠️ Warning: Be extremely careful with drive letters and partition numbers—running shred /dev/sdx/ without the partition number will wipe your entire drive!
For those less comfortable with command lines, GParted provides a graphical interface similar to Windows Disk Management. To identify the correct drive in Linux, look for Windows installation folders like Program Files, Windows, and ProgramData. If these folders are present, that's your Windows installation drive.
When all else fails, the nuclear option exists: complete OS reinstallation. This is by far the most foolproof method for eradicating malware, as it gives malicious software nowhere to hide. All data on the storage drive is deleted and overwritten, creating new partitions that break any remaining malware's ability to function. Microsoft's Media Creation Tool makes creating a Windows bootable USB straightforward, while tools like Rufus or Etcher work well for Linux distributions.
The downside, of course, is data loss and the frustration of reinstalling everything from scratch. But when dealing with particularly vicious malware, this may be the only way to guarantee your computer's safety. Each situation requires evaluating what's at stake:
Malware Removal Strategy Decision Guide:
-
🔍 Mild infection, system boots normally → Use Malwarebytes, MSRT, or Sophos Scan & Clean
-
🚨 System boots but antivirus blocked → Create and use bootable rescue USB
-
💀 Cannot boot or persistent reinfection → Consider Linux boot drive for formatting or complete OS reinstall
-
💾 Critical data without backup → Rescue USB data extraction before any wiping
Through my experiences battling malware, I've learned that preparation is everything. I now always keep a rescue USB handy, regularly back up important data, and maintain multiple antimalware tools on external drives. The peace of mind knowing I can recover from almost any infection is worth the small investment in preparation time. Remember: in the digital world, your USB drive isn't just for file transfers—it can be your most powerful weapon against the malware that threatens your digital life.